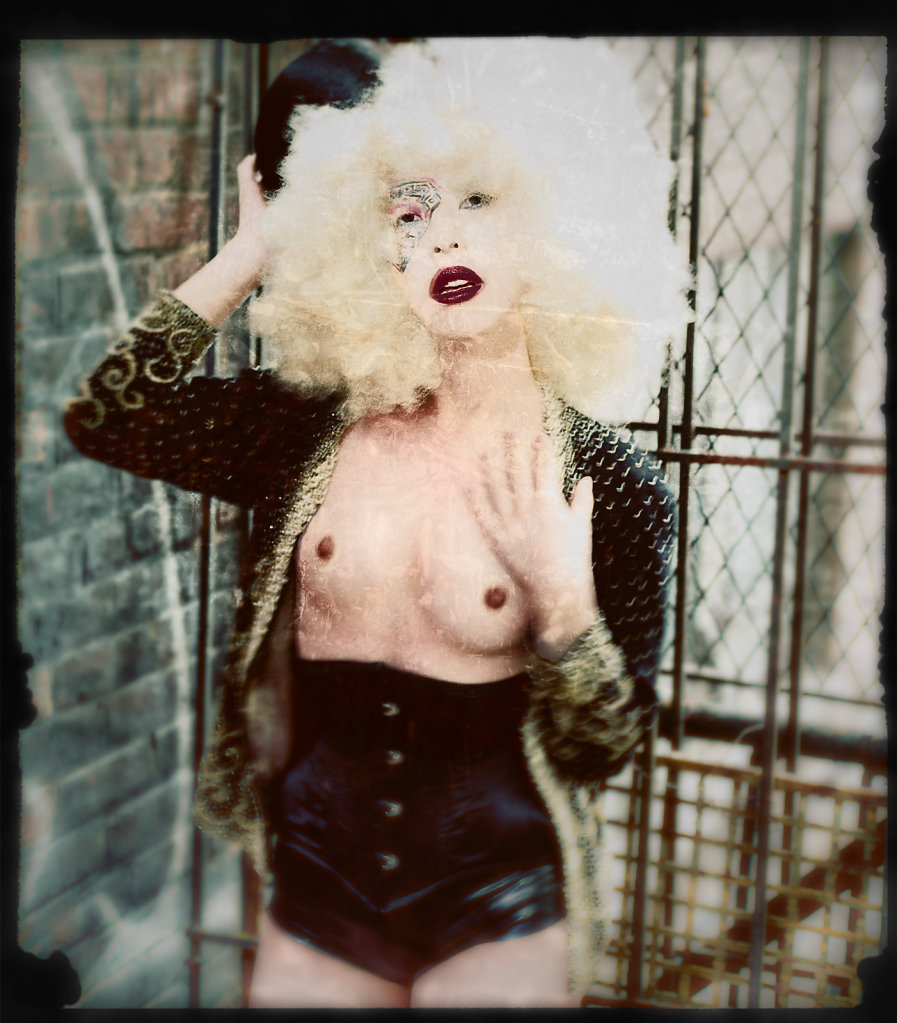
So it's been a little while, but I've been a bit busy. There will be new content soon, I promise! Also I plan on adding a support page so if you want more content you will be able to support said content and of course any additional projects I may be working on.
I leave you off with an image from one of my new projects!
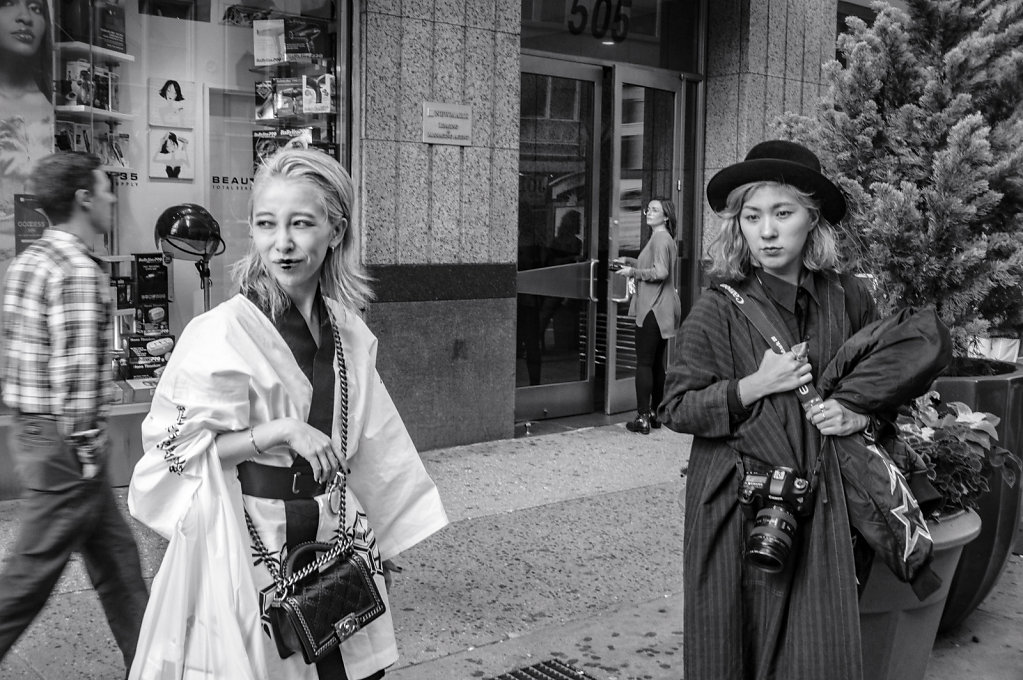
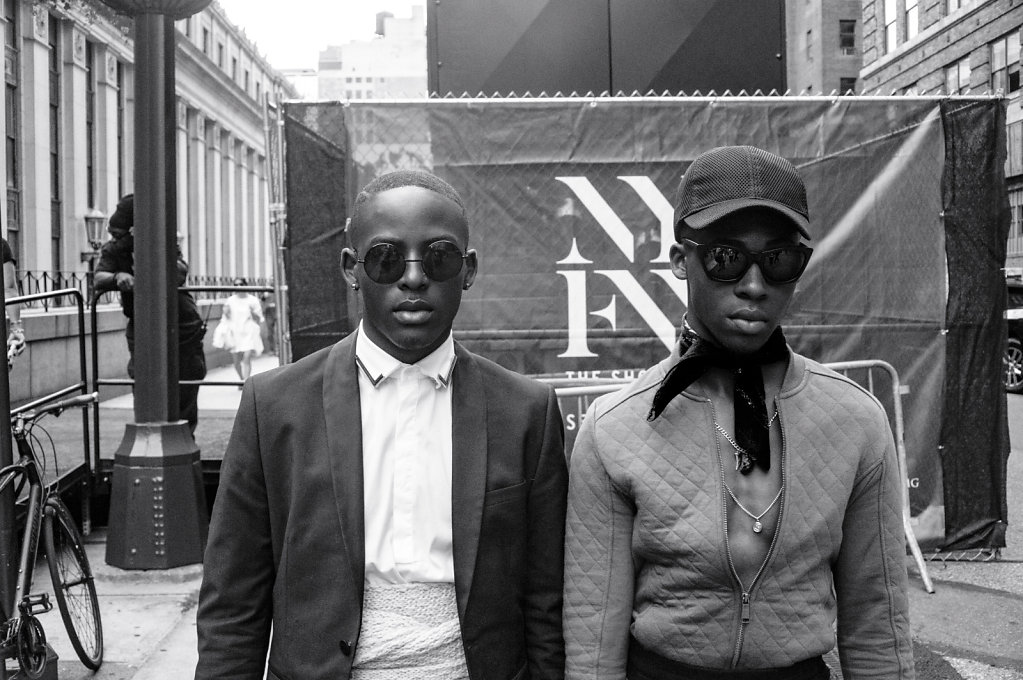
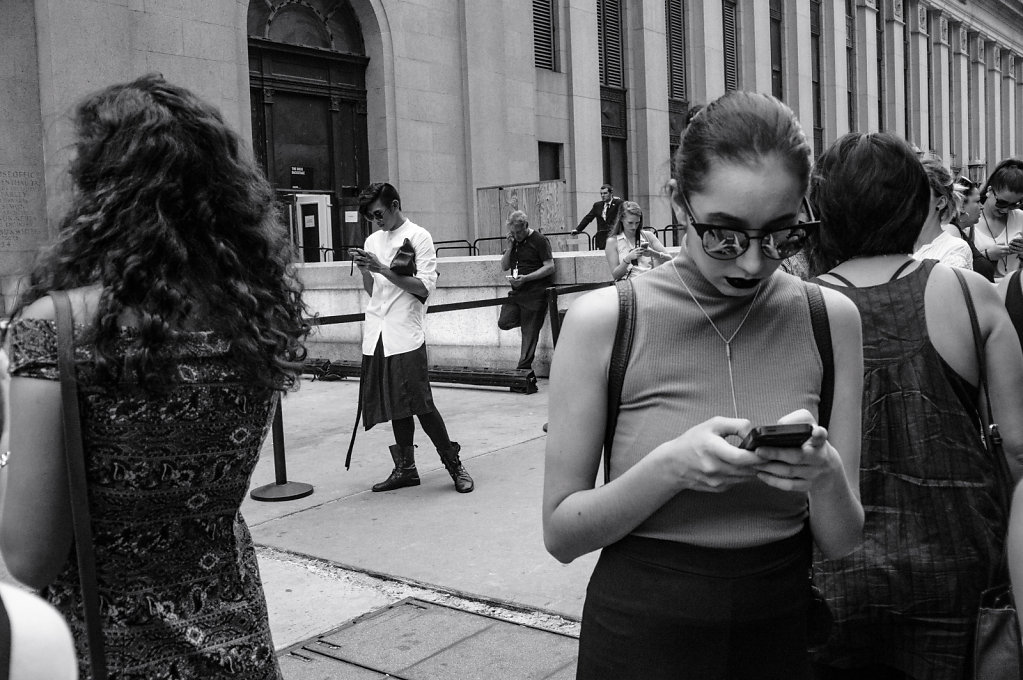
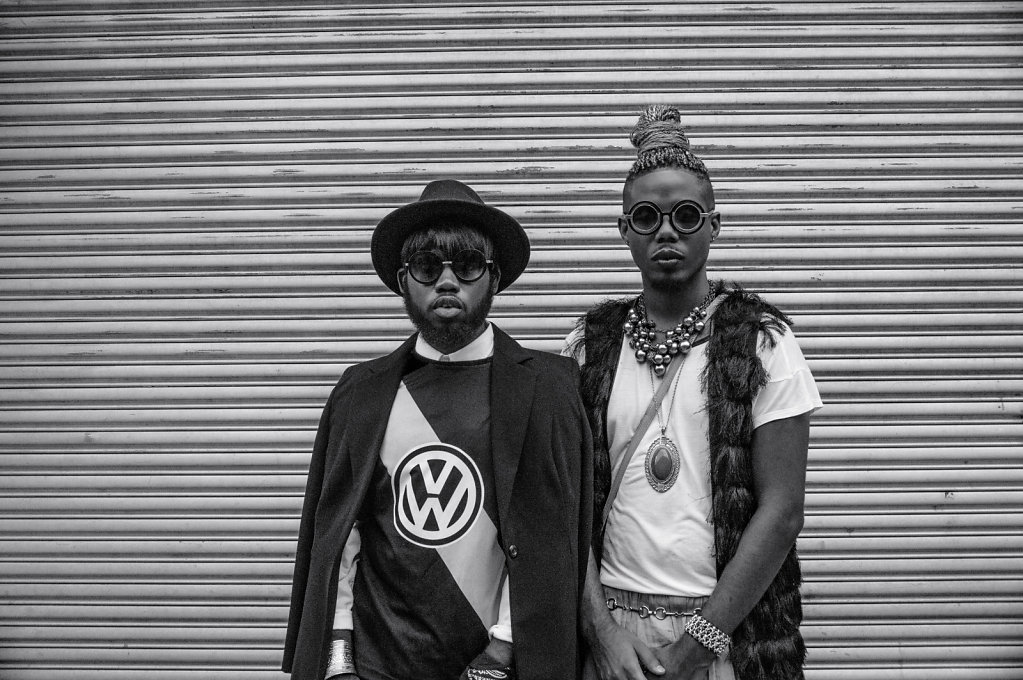
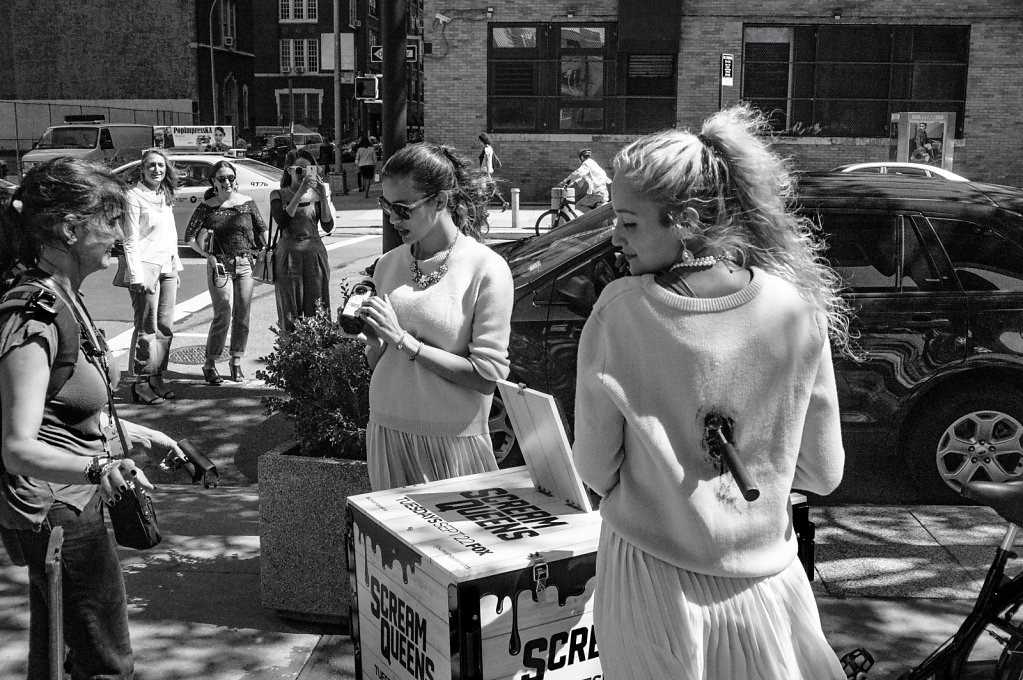
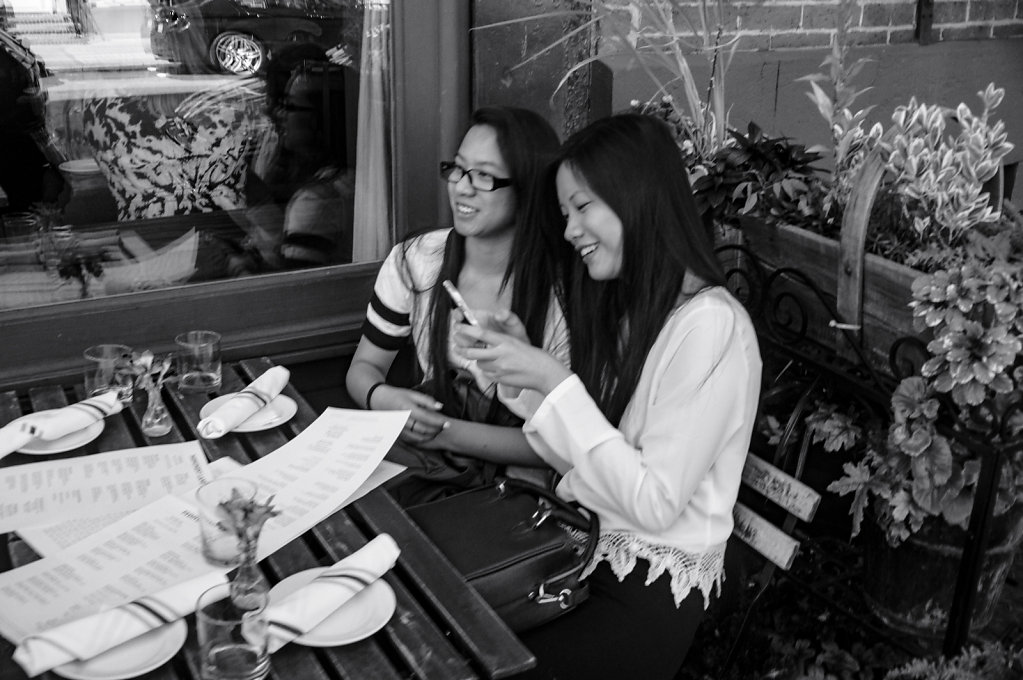
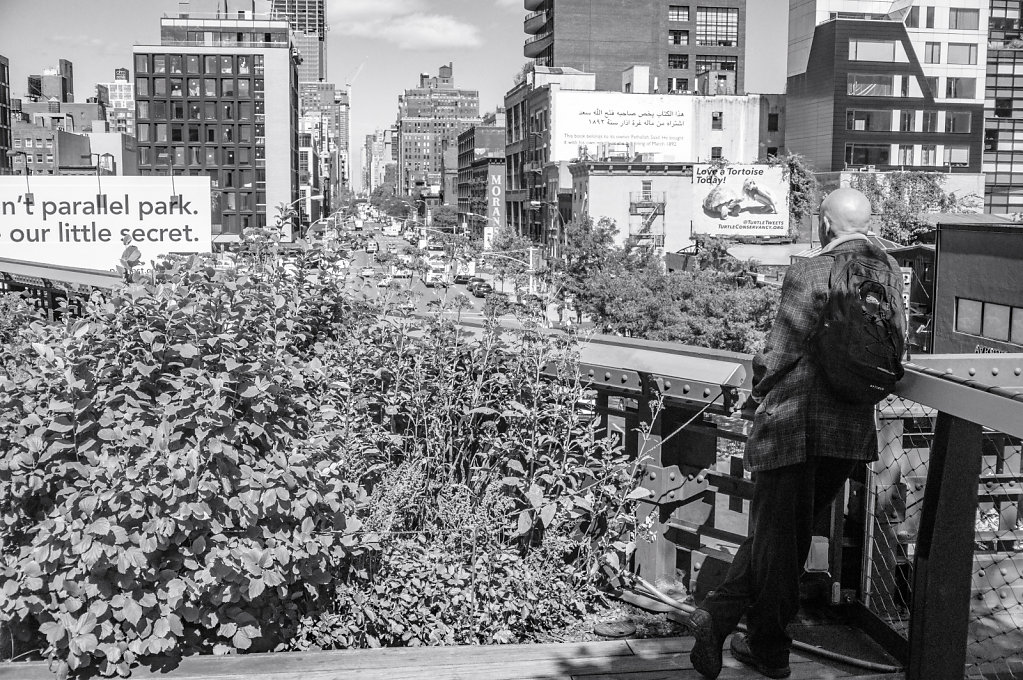
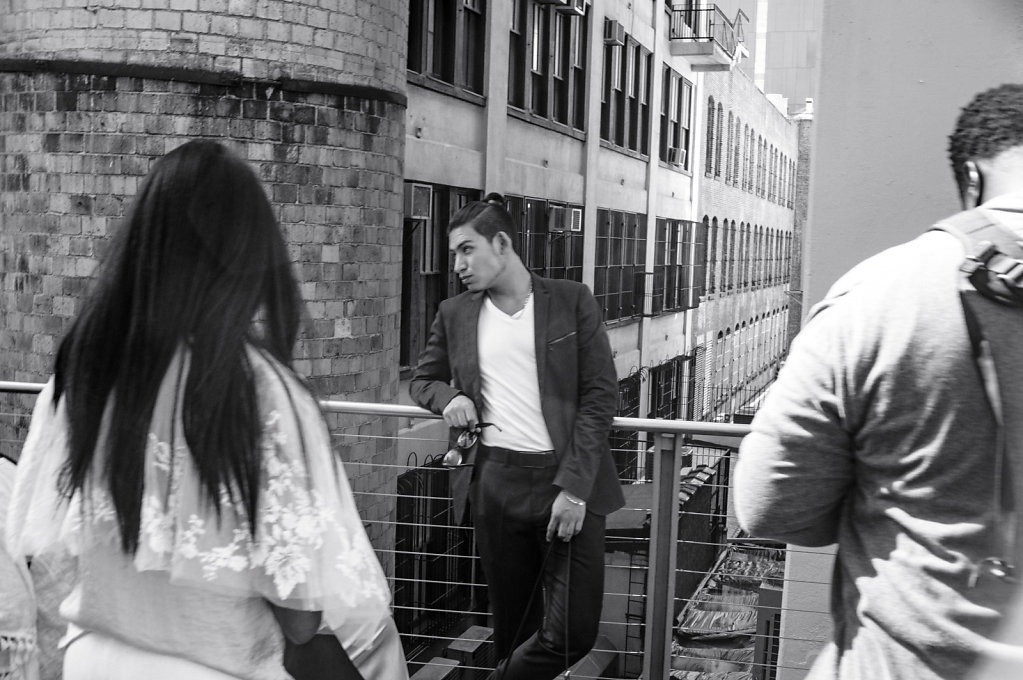
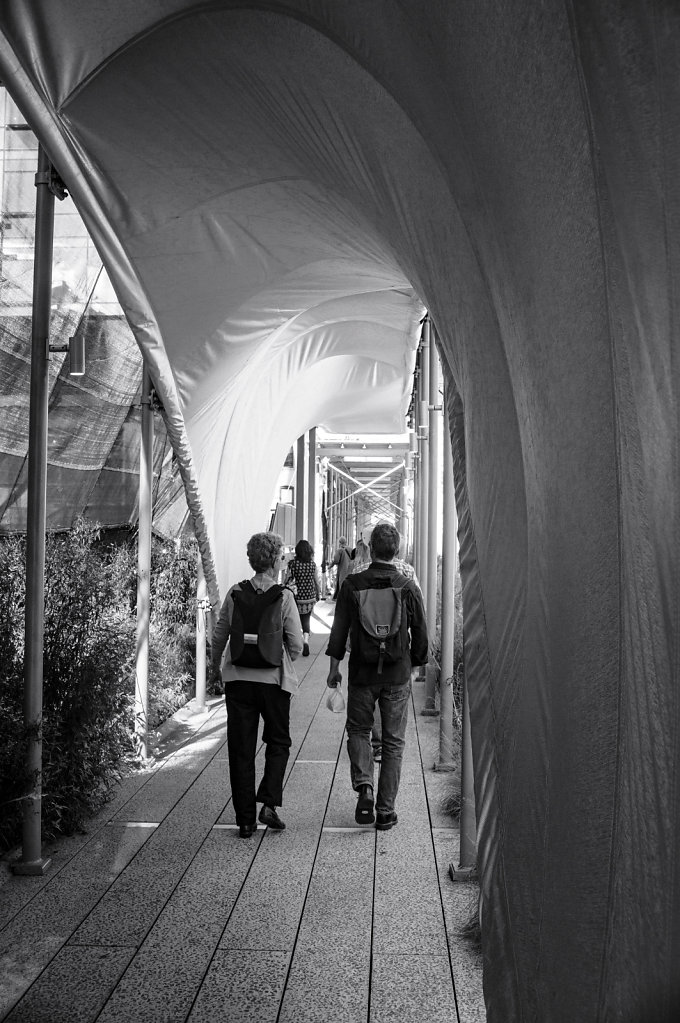
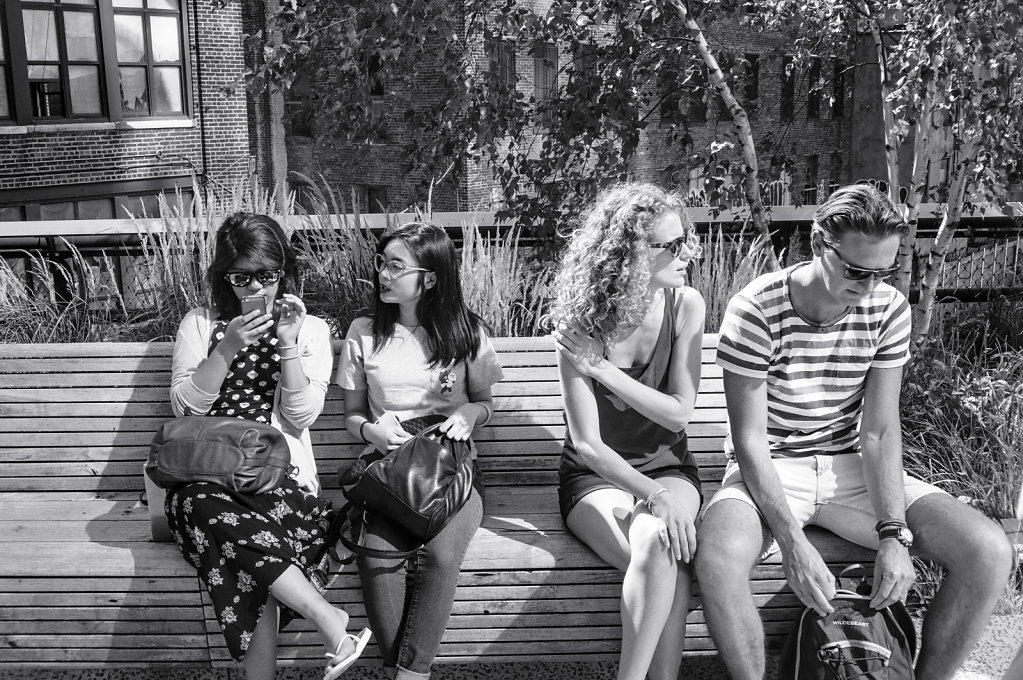
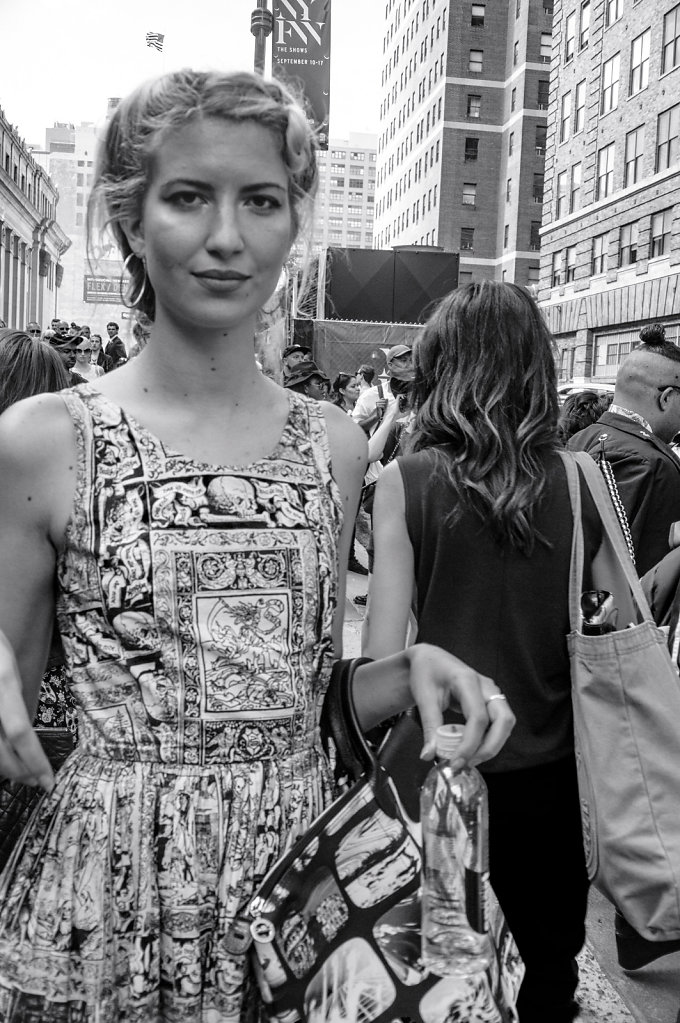
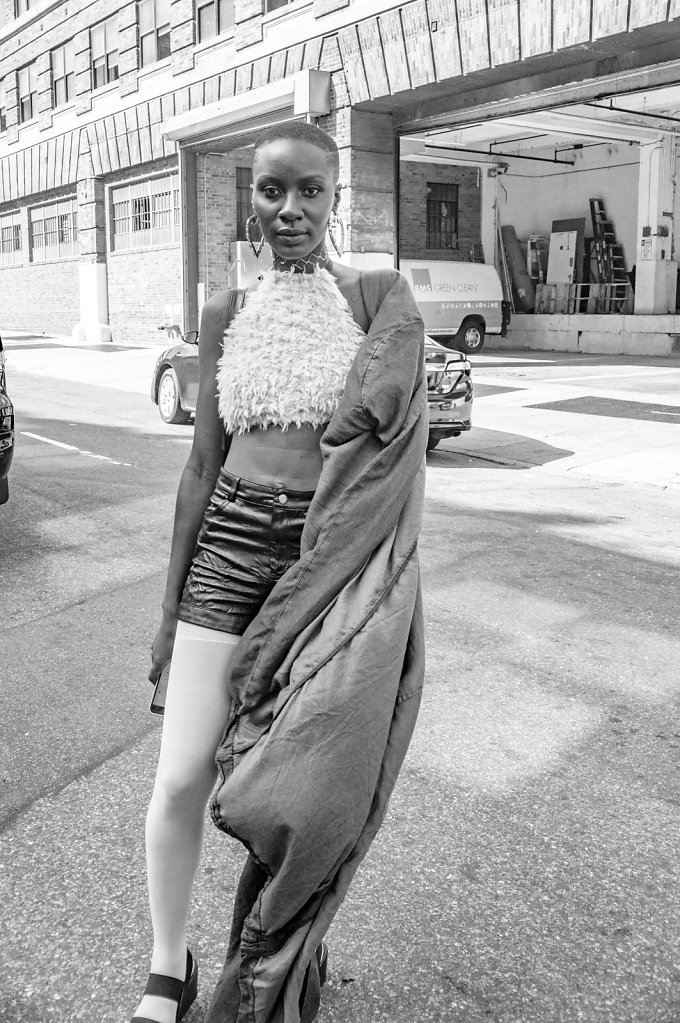
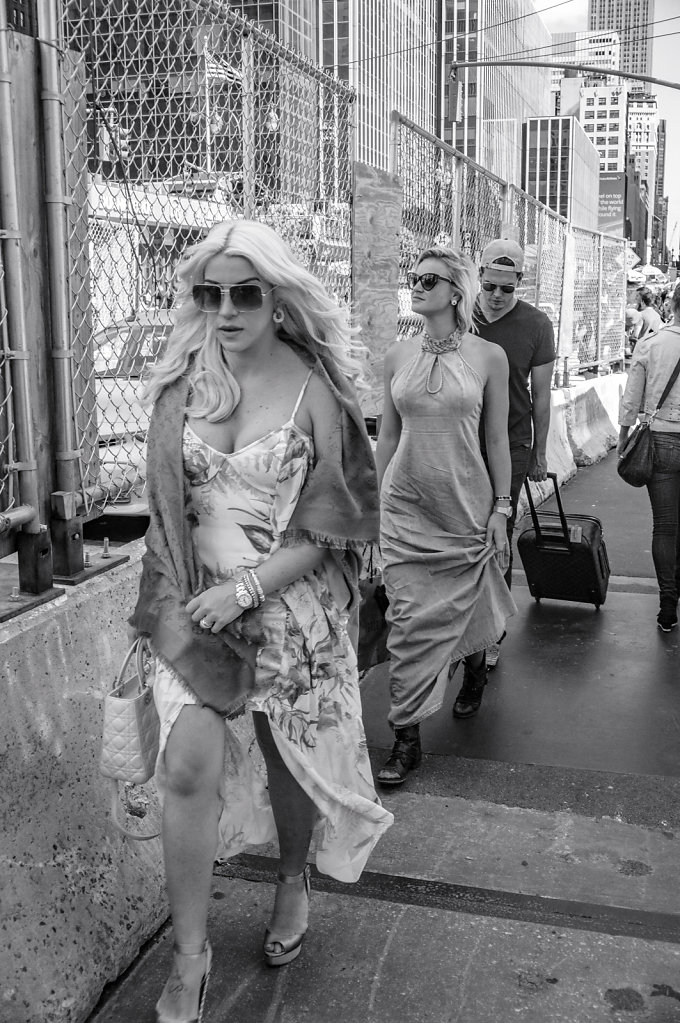
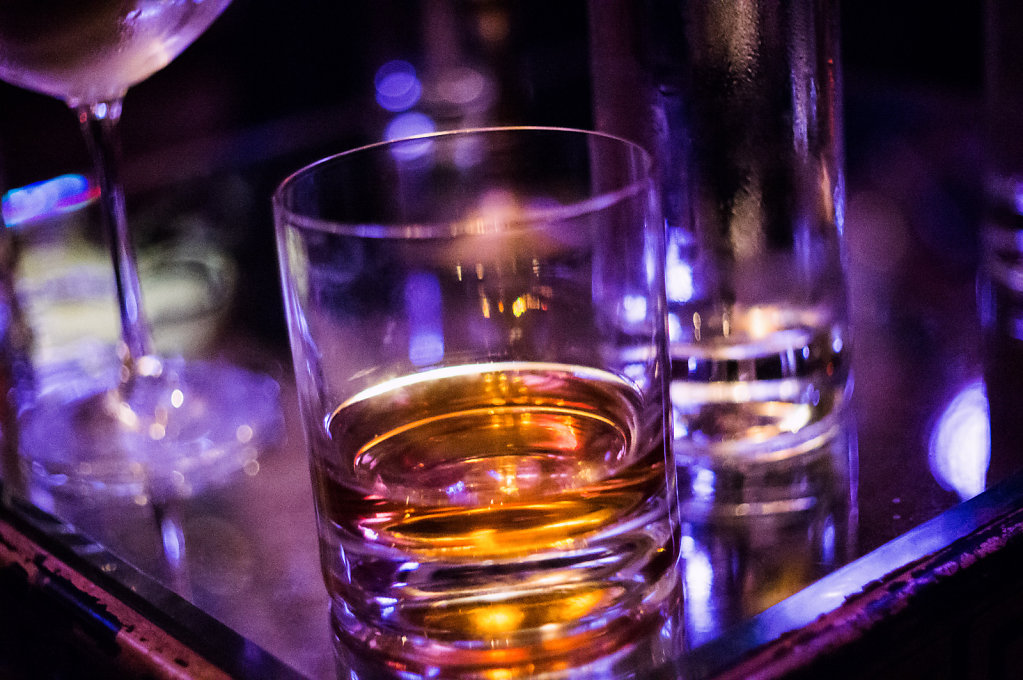
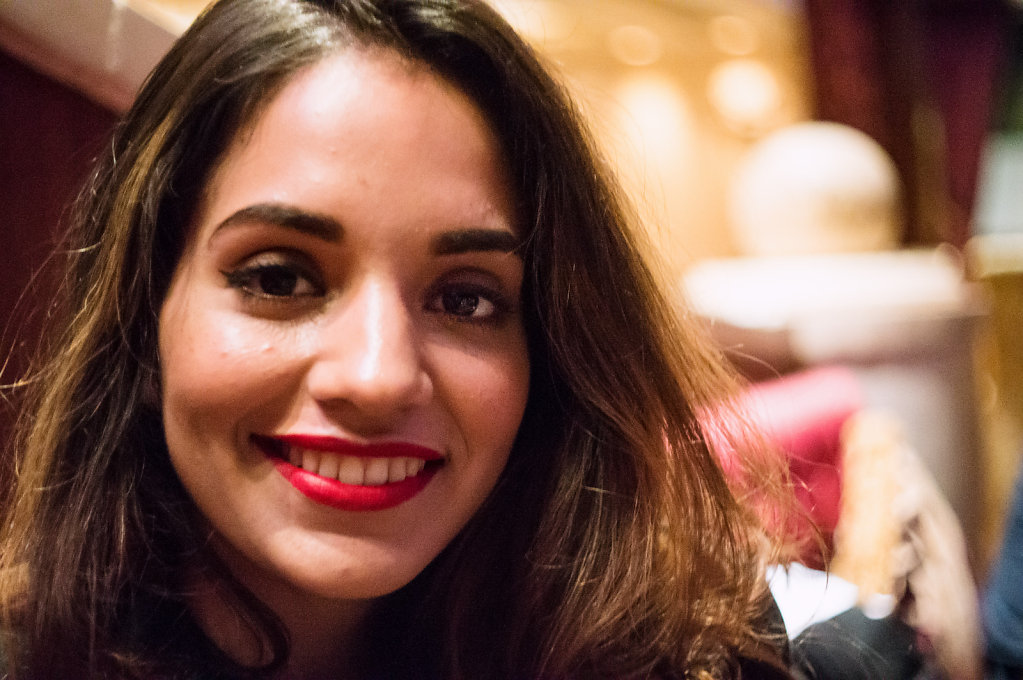
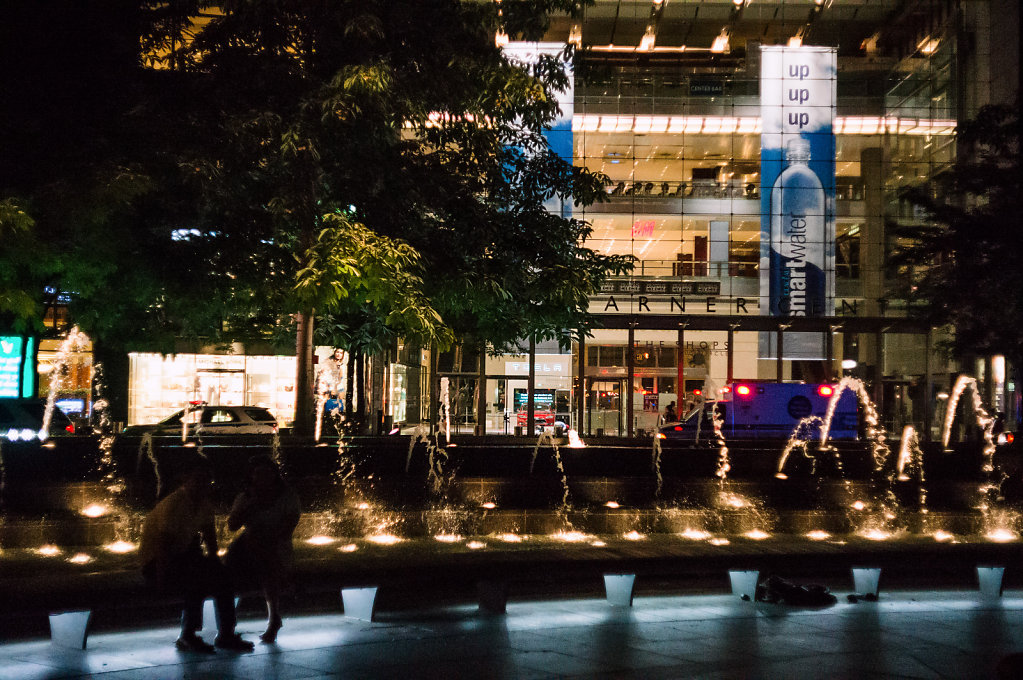
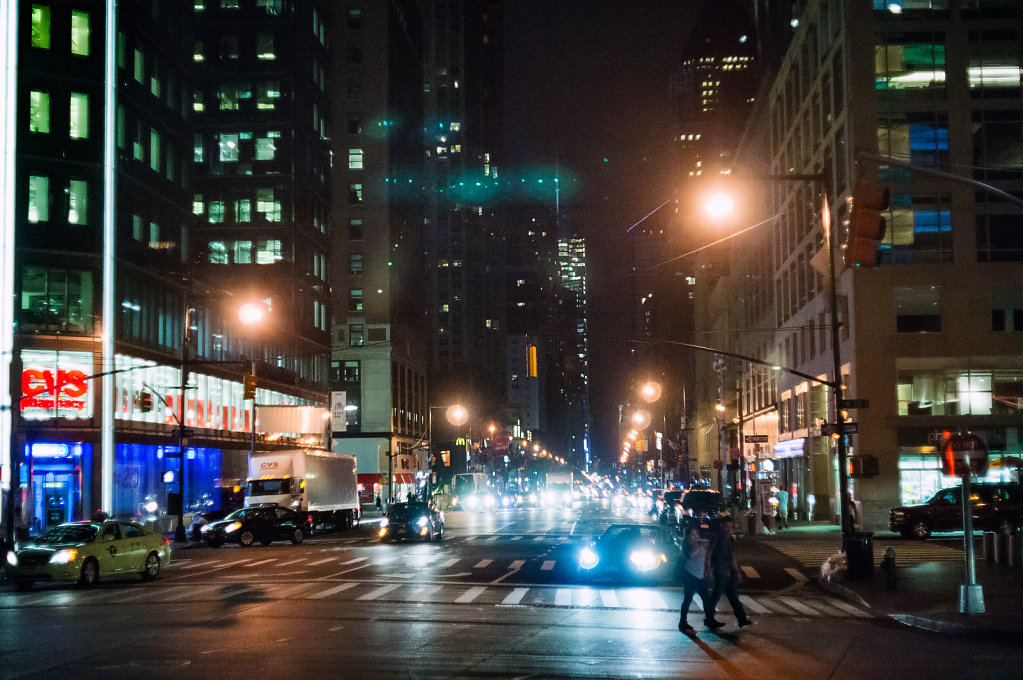
While covering New York Fashion Week for WWD this past September, I had a chance to wander around the local area and do a little documentary work. Enjoy.
I was recently asked by a friend via Facebook about image management and work flow. The question was involved enough that I felt like writing an article about it. If you have a question you think would make a great article feel free to ask me via Facebook or Twitter. So here is the three part question from Chuck Cage via Facebook.
1) What's the best system to store them? Date? Date then "session?"
The best system is the one that make the most sense to you. For me I break down the file system like this;
Year > Month > Date > File Type
I use a Client ID when renaming the files after transferring the card I shoot on to my storage drive. That looks like this;
Date_ClientID_Sequential Number.File Extension
An example of said file numbering is 10062015_Vogue_0785.TIF
2) I have a full Adobe subscription. What's the best of their software to help me sort/maintain archive/find things?
Oh man, is this one a bit of a thorny issue. Personally my image management is tied very much to my work flow. For me Bridge and Photoshop work fine along with an application like Evernote as I keep a shooting log there. Using the date in the shooting log I can quickly find what I am looking for on my storage drives. That said, my system is pretty archaic and has quite a few drawbacks, most of all keyword search.
Now if I were more of a photo journalist, where such searches are more useful Adobe Lightroom is a better system. Lightroom can let you use a file system much like I do, but also allows you to work in "collections" which have a plethora of benefits, some of which I will discuss on my article on Medium Format Work flow. Collections are much like Albums in iPhoto, but with far more power. You can also using keywords sort your images into Collections which makes the tracking down of images far easier.
Finally Collections can be cloud synced to a mobile device like an iPad or in my case the Samsung Galaxy Note Pro 10.1 2014 that I am writing on. Using Lightroom Mobile you can even do post production on the images and have those changes update back to your desktop. If you have a way to transfer images from your camera to your mobile device you can also add images via Lightroom Mobile to your system, though do this over WiFi as if you shoot in DNG like me your data rates will choke on a single shoot.
3) My workflow is generally simple: d/l card to folder, use bridge to browse/flag interesting stuff, select from sorted, open in PS, process, throw away PS. How dumb is this?
Well outside of deleting files I didn't use on first go, this isn't dissimilar to what everyone does. To be honest from what you are stating Lightroom would be a better choice unless you really need to do some heavy post work. Lightroom allows some post work to be done and even supports layers and via several third parties allows the application of specialized filters. My work flow for instance is not that different than yours. I transfer the card (if shooting on cards), rename, add keywords and other EXIF data, select and tag, batch convert to 16 Bit Tiff and then start post work in Photoshop. After that I will convert the final images to JPEG for Web or transfer in most case.
Well folks that covers it for today. If you want your question answered here in this section please feel free to ask via Facebook or Twitter using the hashtag #qftg.
In the last article we discussed the various capabilities in using old lenses on modern digital cameras, MILC to be exact. In this article we'll go through the complete process of developing RAW files with an eye on how to correct or enhance the unique look of these optics using the Pentax Q and Kern Paillard lenses from the late 50's.
What you see above is my Pentax Q with a C-Mount adapter to use the Kern Palliard (KP) SWITAR 25/1.5 lens. C-Mount lenses cover a 16mm film frame and currently are available in two types - motion picture and CCTV. Now while the modern CCTV lenses are multicoated affairs, they are optically inferior to their motion picture brethren. The KP's (the one on the camera is from 1956) are considered to be the Leica of 16mm motion picture lenses, with incredible optical quality. The downside of using vintage motion picture lenses is they are made of either single or uncoated optics that can cause a bit of chromatic aberration that can be difficult to correct for. In this case we have a single coat optic.
Since this article is about dealing with these sort of optics let's just dive right in. Above is a shot of Cory Nova from the Q shot using the KP. As you can see the contrast is a bit low and the color a tad cool. What really stands out though is while technically sharp the lens due to being single coated has a certain softness. The first thing we must address is the color and contrast.
First off we address the color by shifting it just a tad warmer. We also drag down the highlights and bump the shadows up ever so slightly. Oddly we decrease clarity and do nothing in the contrast. The clarity drop is to give the skin a smoother look. Increasing contrast is not done as that would tend to contract the histogram, giving less leeway when doing post production in Photoshop. Please note this is the ACR control panel, not Lightroom. We'll delve far more into that application when I publish my 645Z articles. So if I didn't add contrast how did the contrast increase ever so slightly?
In the latest versions of ACR and Lightroom there is an FX tab that has a wonderful feature when dealing with the "haze" that single coat optics have on digital sensors - DeHaze. This is a bit different and not as destructive as just cranking up the contrast slider. The idea here is not to use too much. A small amount goes a long way. One thing you'll note is that I did not address the "sharpness" of the image yet. I don't in the ACR, but do in Photoshop. At this point I export out a 16 bit TIFF and move to the next step.
One reason I use Photoshop over Lightroom is the extensive retouching one does in much of the work I do. It is by adapting the technique I use for retouching images I can increase the "sharpness" of the final image. Above you see the final exported image. The next step is prepping this image for retouching by making two duplicate layers.
The first layer is what we call a "low frequency" layer. It is created by duplicating the original image onto a new layer then applying a slight gaussian blur. This is the layer we use to correct color and such.
The next layer is the "high frequency" layer. This again is a duplicate layer, this time applied to the low frequency layer and creates a grayscale image that contains all the detail information for retouching. At this point I do all my retouching work. Once done I duplicate the high frequency layer leaving the blending option at "Linear Light".
Much like the ""high frequency" layer this adds detail. I drop the opacity to around 50% so as not to over sharpen the image. From this point I flatten the image and carry out my final post process procedures. Now while this may seem a bit long and involved it really isn't. About the best way to perhaps save time in this process is to create a custom lens profile for the ACR module. Now since this is just a small MILC and not a Medium Format legacy camera like say a Mamiya RZ or Hasselblad 500CM using a Phase One back, I really see no reason to go through all that. In the future however I will do an article on this in case any of you do want to do this. I'll leave you off with the final image to enjoy and hope you all join me here for my next article.
Yeah I know, I'm a bit behind but I have an excuse! I've been shooting at New York Fashion Week for WWD (Womens Wear Daily). I promise new content soon! In the meantime please enjoy this shot from the only show I actually went to because I just love this designer's work and of course it was her 50th anniversary in the fashion industry, Betsey Johnson....
This week part 2 of my article on working with legacy glass on MILC's will be up along with hopefully part 1 of my Pentax 645Z article. In the meantime I am right now starting to get together a new personal project called Instant and hope that all of you out there support it with a small donation :) Here are a few images from my experimentation for this project....
The photos you see below were all shot digitally on cameras that do not have the mounts natively of the lenses used to shoot them. You see the lenses used to shoot these images are between 50 and 60 years old. How could I shoot these old lenses on a modern digital system? I used a pair of Mirrorless Interchangeable Lens Camera (MILC).
Over the last few years these types of cameras have become more prevalent in the consumer sector and with the introduction by Sony of a "full frame" MILC, now begins to enter the professional market.
The question many of you of course who aren't acolytes of the modern camera world will have is what exactly is a MILF anyways? Granted the vast majority of you will be a bit more advanced and will know what they are, so for those of you please indulge me while I educated the less initiated among our readers.
Basically cameras use one of three systems to create a way to preview an image prior to shooting. The most common on cameras where you can change the lens involves a mirror in the path of the light between the lens and the focal plane which bounces the light into a prism and mirror system so you can see what the lens is pointed at. This is known as a Single Lens Reflex camera. When you see the contraction DSLR you are basically discussing a camera with this type of viewing system for composing and focusing the camera.
A MILC eschews the mirror in the light path either using direct viewing or some other system to compose and focus the image. In most modern digital MILC that would be either the rear camera screen (giving us a digital version of direct viewing such as one would have on a large format camera) or on cameras sold more to the enthusiast market an Electronic View Finder (EVF). I could discuss Rangefinders but that would needlessly confuse the situation, so let's just work with the above.
The benefit of using a MILC is that they tend to be much smaller that cameras with the same sensor size since there is no need to create space for a mirror and it's flipping and instant return mechanisms. Smaller cameras usually means smaller lenses and less weight to carry around all day when you are out shooting. There are of course drawbacks, but technology is quickly eliminating many of the issues.
One of the benefits of all this is that the registration distance (the distance between the back of the lens to the focal plane is reduced. This has become a major selling point of these systems, many competing to get thinner and thinner.
Now why is this benefit? With such short registration distances this allows for a unique situation, if one can via adapter extend that distance and allow the mounting of other lenses, one could conceivably mount practically any lens one wanted at any time. Capitalism being what it is a small cottage industry around just that very idea has evolved in the last few years. Almost any MILC can currently be adapted for almost any lens mount out there. Now personally I don't understand why anyone would want to mount say a Canon or Nikon lens to an MILC outside of being a bit of a gear freak, but for those of us who have lenses for systems long abandoned prior to the digital revolution this becomes a very attractive option.
I personally own two MILC systems specifically for this purpose. One is a Sony NEX-6 which I use with Olympus Pen F lenses from the 60's. The other is a Pentax Q which I use with Kern Palliard C-Mount lenses from the 50's and Pentax Auto 110 lenses from the 70's.
The above image demonstrates what I love about these old lenses. The draw of these lenses is due to the very different formulation as well as the fact that these lenses were hand built and hand polished. They had a very different character than modern lenses, a bit softer but still "sharp". Of course using these older lenses does incur some penalty on digital sensors. The biggest issue is that to modern eyes these lenses tend to have low contrast.
The major reason why is that lenses back in the 60's and 50's either had no coatings (the case with a certain Kern Palliard you'll see in part two) or are just single coated, like each of the Pen FT lenses I use with the Sony NEX-6. Of course more recent lenses, those built mostly in the 80's onwards tend to have a good look on a digital camera, but these older lenses do need some work.
Both of the shots above for instance were shot using a Olympus 38/1.8 for the PenFT. Being single coats the contrast was quite low compared to a modern lens. Another issue is that older lenses tend to be a bit warmer in color rendition than modern lenses, requiring a bit of work to adjust color unless you are willing to create a lens profile for it.
Of course if you are using a 500 series 'blad with a Phase One back, this is something you've probably done, but if you are using some funky lenses on a consumer digital, you've probably haven't, and if you are into Lomography may not want to.
Now granted the focal length's I am using on these systems are fairly easy to match with modern lenses for each system, but with that said, there is a certain charm and of using these older vintage lenses. The feel of a smooth focus ring, the satisfying click of the aperture ring, and most importantly, that unique look lenses of those eras give an image.
In part two we'll look at some images from the Pentax Q and go over ACR processes to keep in mind when working with these vintage lenses.
Just a quick update folks. I haven't added an article in a little bit as I've been a bit busy. That said however I will have great content soon for you all including a two part on using old lenses on MILC's and a special educational article on shooting tethered with the Pentax 645Z. I will also be giving you all a review of Polarr, a new image editing app that is similar to Snapseed 2.0 and works nicely in conjunction with it.
In the meantime some nice test images shot with my Samsung Galaxy S5 and processed using Polarr and Snapseed.....
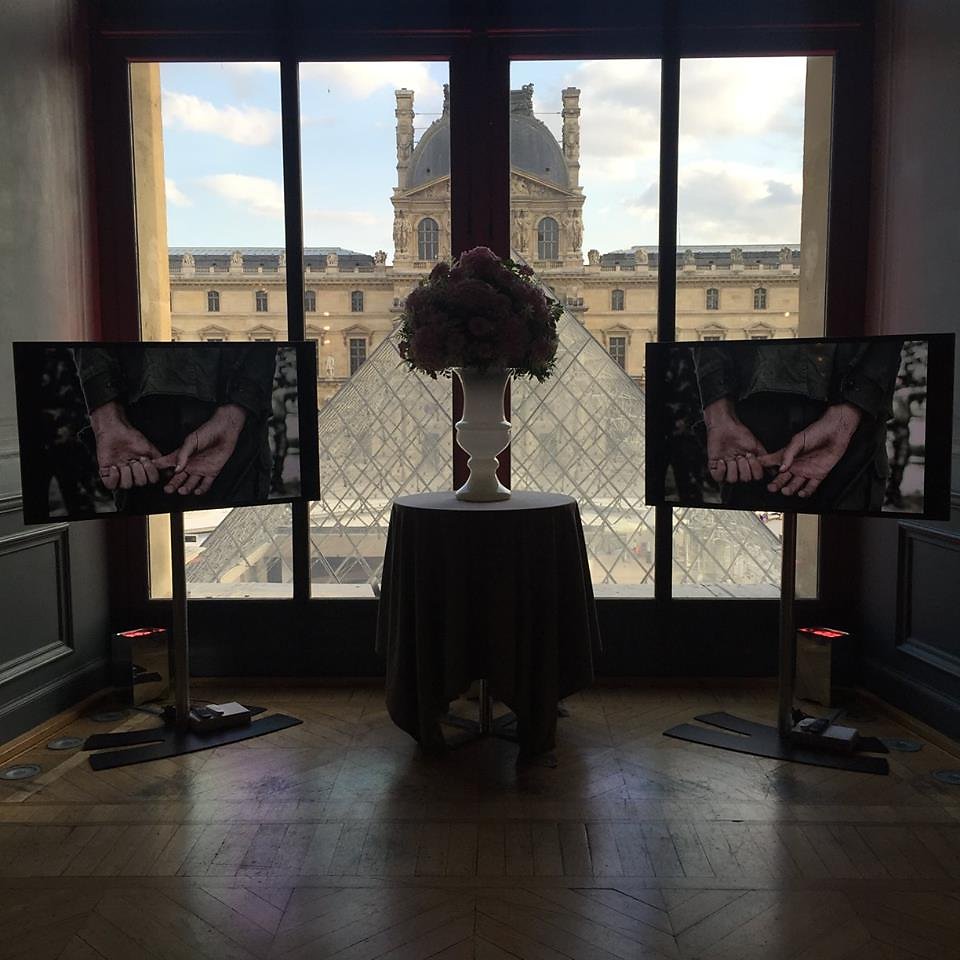
I want to thank everyone from See.Me for including me in the Exposure Exhibit that just finished up at The Musée du Louvre on Monday. It was a great honor to be included. To be honest I've never considered myself an artist. I'm just a photographer. I feel a bit overwhelmed by this and to be honest a bit undeserving. I share an image with you all of one of the displays at the Louvre to give you an idea. There were several of these in the room where the exhibit was.
Again my thanks to the folks at See.Me and to all of you who took the time while in Paris to visit and see the exhibit. It was a great honor to be included. Here is the image used in the exhibit. You can find it in the Junk Fashion Gallery here on this site.
I love George Hurrell. Now a few of you may be asking "Who is George Hurrell?" Without going to far into a history of 20th Century Photography, George was the man who MGM back in the Golden Age of Cinema would have photograph it's stars. Folks like Veronica Lake, Bette Davis, Joan Crawford, Clarke Gable and Marlene Dietrich among many others were subjects of his 8x10 camera. Many times these shots were done on the very sound stages in between setups that were being filmed, George having mere minutes to setup the shot. So great was his skill that even at the end of his career, entertainment's latest and brightest would make the pilgrimage to his lens. Madonna and Brooke Shields among some of his final subjects.
What made George so great? It was the fact that he was the master of using a single light. Now there are many of his shots when he had the chance to shoot in his own studio that used more than one light, but his most iconic shots of the great stars of the silver screen are one simple light, usually shot "broad" in Rembrandt position with the light to camera right. No diffusion, just a hard light usually some motion picture light swung into position for the 20 minutes or so he was given to shoot his subject on set.
Above is the diagram for the typical setup George used. Since he was on an 8x10 his portrait lens was a 300mm/5.6 lens wide open. That is basically for you 35mm folks a 50/1.0 or so for FOV and DOF. For me it's basically my 75/2.8 wide open using my Pentax 645Z. Mastering a single light is honestly one of the hardest things for a photographer in my humble opinion. A single light takes discipline and skill. No reflector no diffusion, nothing but the purity of light that a single light can afford. It's my favorite way to light a portrait, especially a glamorous one. Here is a shot I recently did of Adriana Vago using what I call "Hurrell Lighting"....
I wish I could show you all what I shot today. Unfortunately it was client work and must wait before it is featured here. Today was a physically difficult day to shoot. It was humid, hot and the clothing was winter outerwear. This entry will be brief, but I will share a location scouting shot with you all......
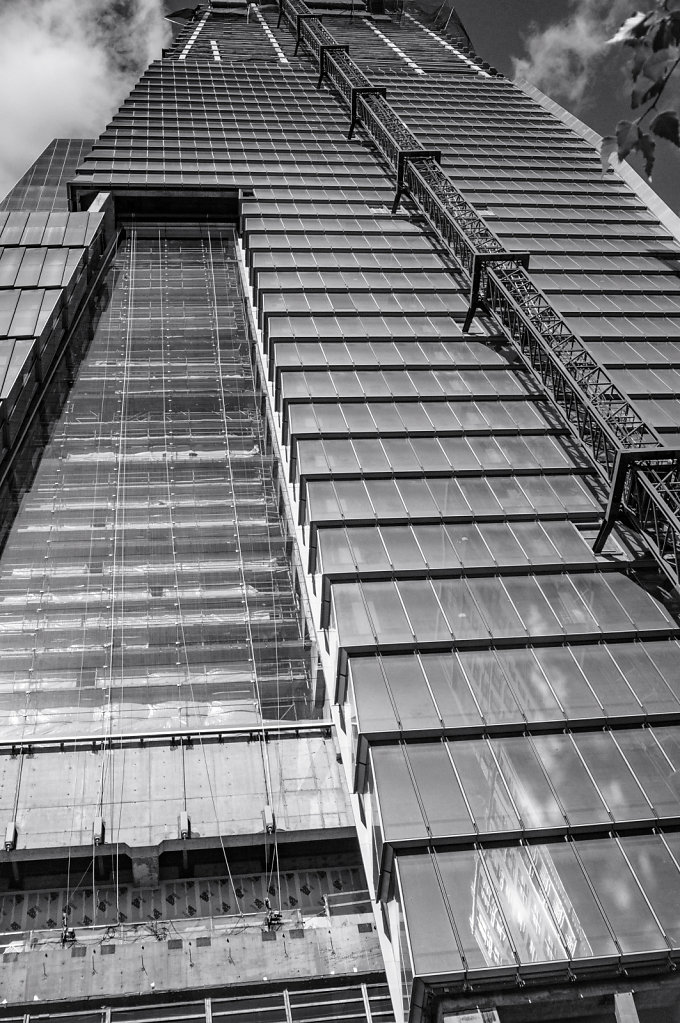
Concrete canyons and caves of steel, the sun rises on spinning wheels.....
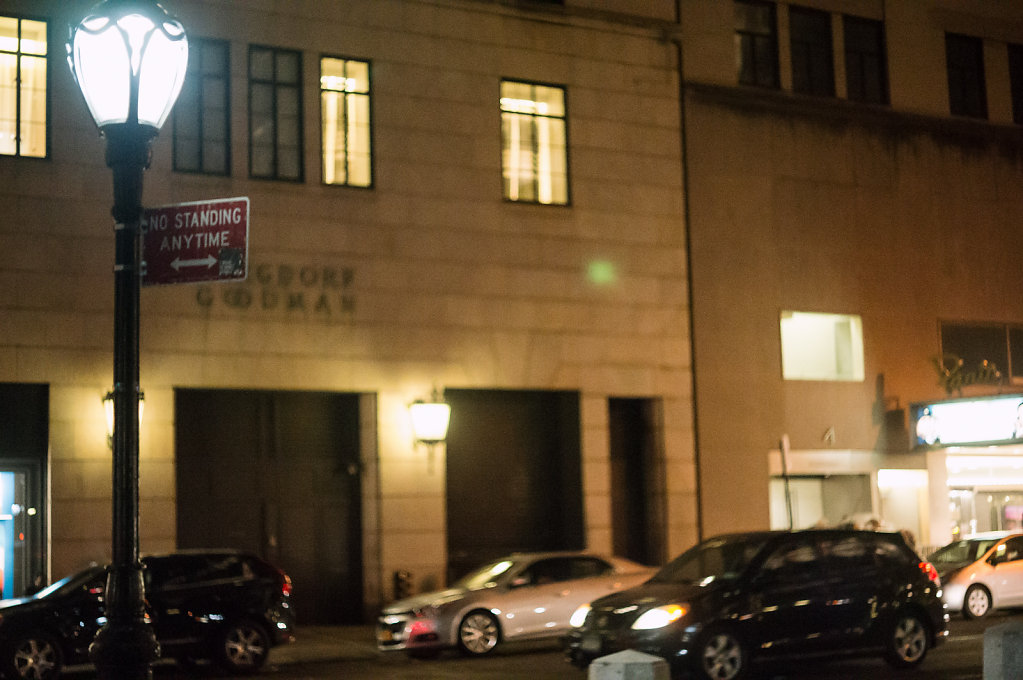
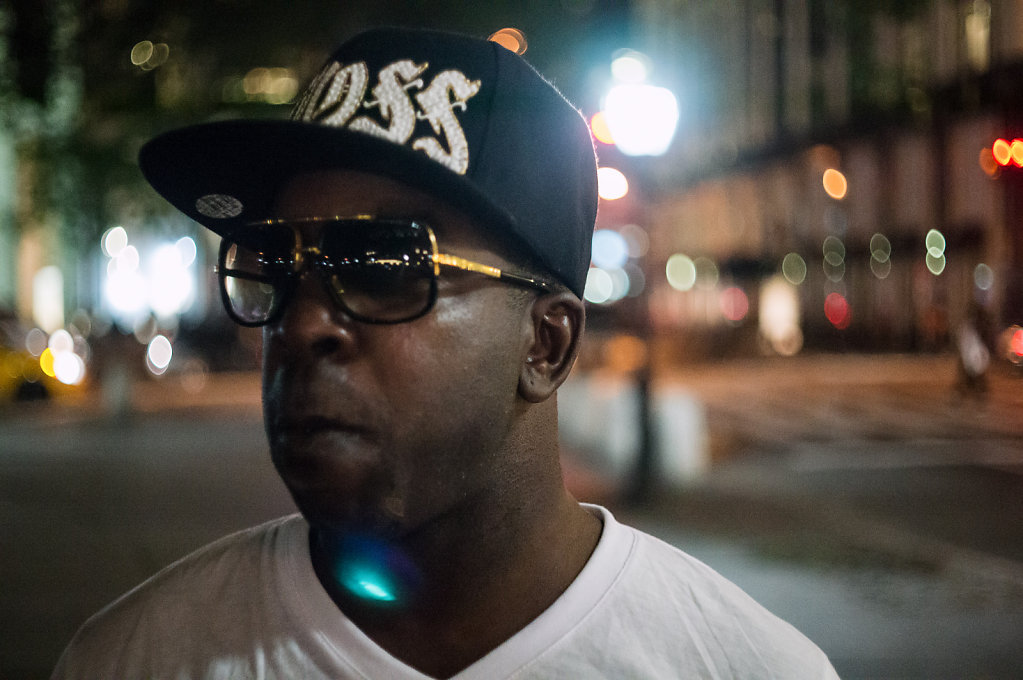
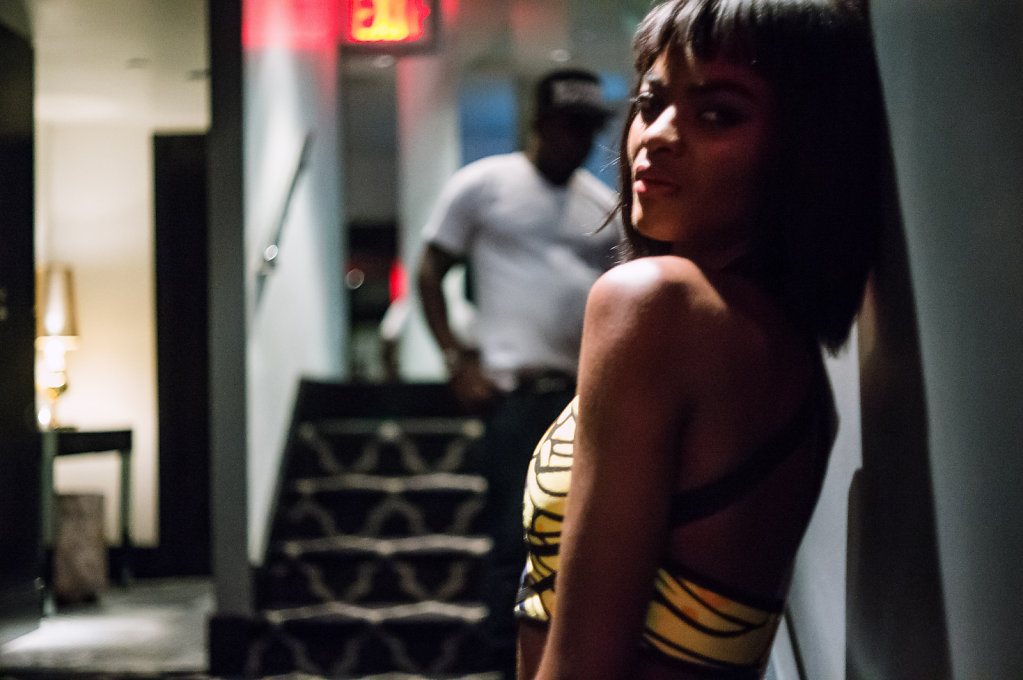
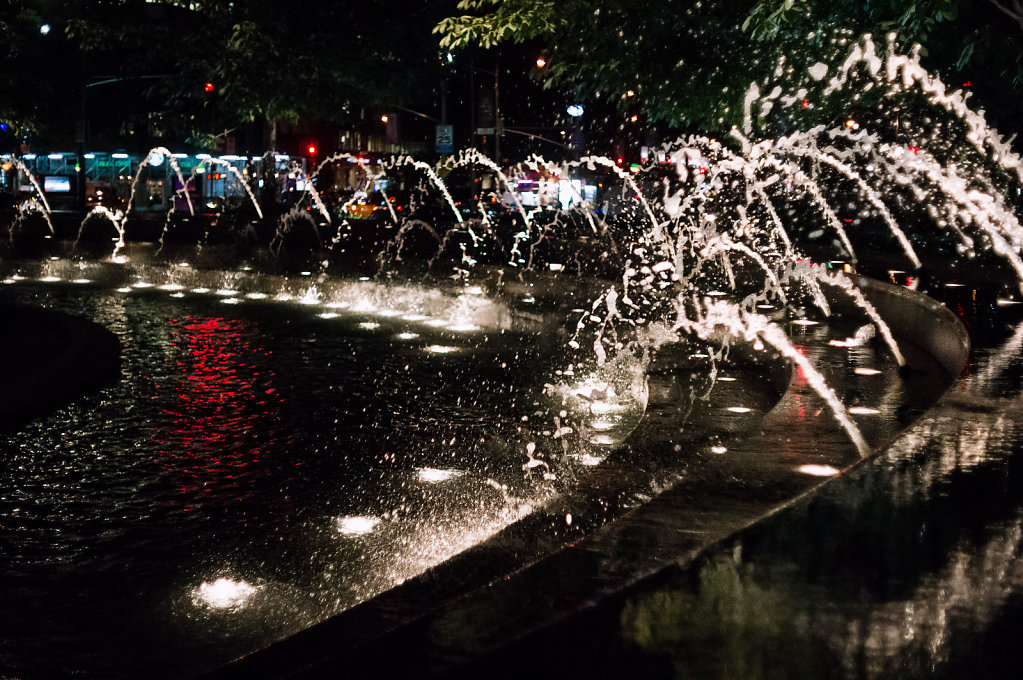
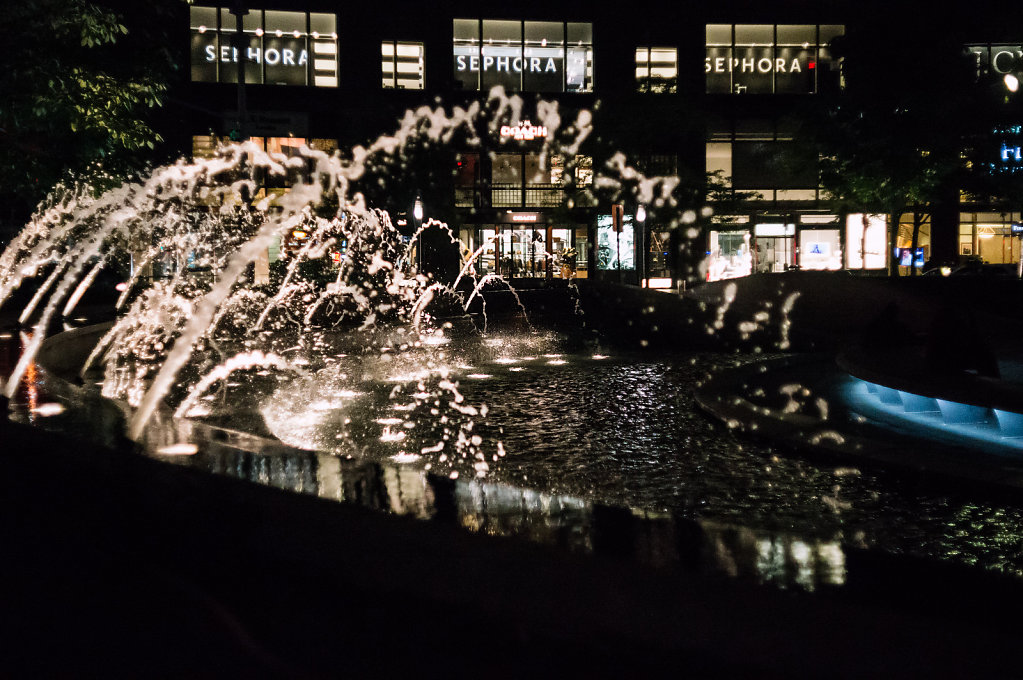
Well I try to write daily into this blog, but that isn't always practical. This week is such a case as it was the inaugural CFDA Men's Fashion Week here in NYC. It was the Spring/Summer 2016 Collections on view and between the house gigs and WWD I was kept somewhat busy. Wednesday night however I took the time to celebrate with my friend Loris Diran after his show which was a great success.
After enjoying a quiet though happy celebration at the Park Plaza Hotel by Central Park, I took the opportunity to do a little street photography using a camera I recently purchased used so I could adapt some classic lenses from the 60's that I love. At some later time I'll discuss more about adapting lenses to mirrorless cameras, but for now enjoy these shots of NYC at night.....
Shot on a Sony NEX-6 using a FotoDIOX PenF to NEX Adapter. Lens is an Olympus F.Zukio Auto-S 38/1.8
This week is the inaugural CFDA New York Men's Fashion Week. I'll be a little tied up, but no worries a proper blog post will come soon! In the meantime please enjoy the hot sticky weather in NYC....
So in my last entry on mobile life I discussed the various cameras and other sundries I carry in my daily camera bag. In this article I will discuss the software I use when being mobile. The first step is however getting the images onto the tablet I use. Luckily the Android OS allows for the use of USB mass storage devices. A simple cable is all I need to attach a card reader and transfer or read directly from the memory card of my camera, in this case my Ricoh GR.
What you see above is the initial screen for PhotoMateR2, the RAW conversion software I use on my Samsung Galaxy Note 10.1 2014 Edition tablet. What you have is basically a file manager much like what you have on a PC or in Lightroom CC, with folder views and easy to navigate touch interface. This is the major reason why I switched to Android over iOS. The ability to control where your files go and the support for mass storage devices via the USB port. If you use an app like Camera FV-5 which supports DNG Raw capture with your cell phone an app like PhotoMateR2 is an absolute must.
PhotoMate does provide a viewer which does take time to render the images as you see above. The faster the card and of course how large the files are, the faster it will render. Usually for me the RAW files from my Ricoh GR, Fuji X100, Pentax Q and Sony NEX-6 all read quite quickly. My Pentax K-3 takes a bit longer and my Pentax 645Z can take quite a while. That said it is amazing that my tablet will handle (or any mobile device) a 51mp image of the type my 645Z generates. If you shoot JPG you could se a WiFi card like an EyeFi Mobi, though to be honest if you are shooting a modern compact you most likely won't be shooting JPEG.
Once you select and filter out the images in the review module using a procedure that transfers directly to Lightroom CC or Adobe Bridge as it is compliant with those packages, you can develop those images in PhotoMate as seen in the screen above. The controls for development are not that different from those you will find in Lightroom CC as you can tell from the above image. I must say that I find it a lot easier to deal with adjustments using a stylus over my finger. I do have PhotoMate on my Galaxy S5 as well as on my tablet so the larger screen is a definite benefit. Once done the image can be exported in either TIFF (both 8 bit and 16 bit) as well as JPEG. Unfortunately there are very few apps in the Android environment that support TIFF for post work unless you want to play with the current GIMP build for Android. Usually I export right back to the card as a JPEG.
At this point I take the developed files over to Snapseed 2.0. Above you can see the UI. What I love about Snapseed is that it works in nondestructive and adjustable layers. These layers can then be copy and pasted on other images and of course readjusted ad nauseum. Again I find using Snapseed a lot easier, especially the new Brush adjustment feature, with a stylus. Really this app has replaced Adobe Photoshop Touch as my go to post production app. Touch BTW recently has had support discontinued as Adobe will be replacing it soon with a new app first on iOS and later on Android.
Let me close out this article with some shots from a walk I recently took at a decommissioned hospital grounds all taken with my Ricoh GR and developed and post processed on my tablet using the two apps discussed here.
Finally for those who subscribe to the Flipboard version of this blog, I've flipped in an article on why shooting RAW is a good thing.
One thing you always hear when using a wide angle lens is to "get close". Since the typical FOV for a cell phone camera is about 28mm, I thought to give this a shot...
Shot on my Samsung Galaxy S5 with post work in Snapseed 2.0. Lighting is a video light inside a Gary Fong Lumisphere and a table top light box. This entry entirely done from my Galaxy S5.
"Is in focus?" As a photographer you get this question often. Often enough a shot in crystal razor sharp focus is what is best. Then sometimes in a rare bit of luck you just discover that magic happens....
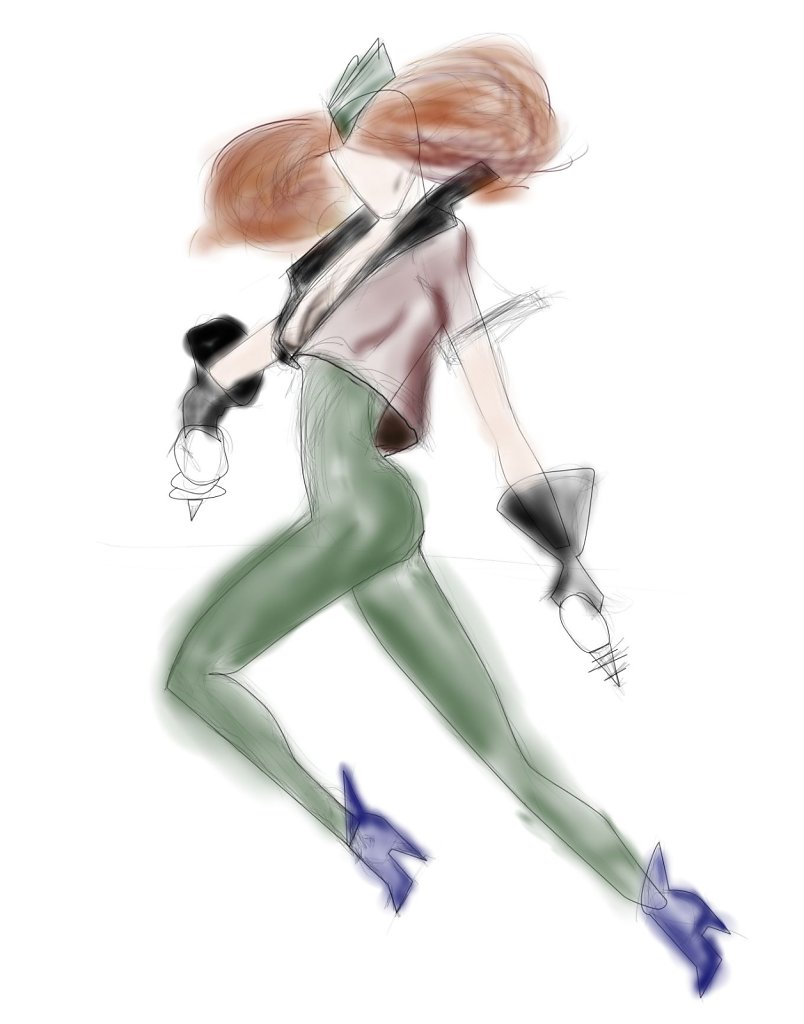
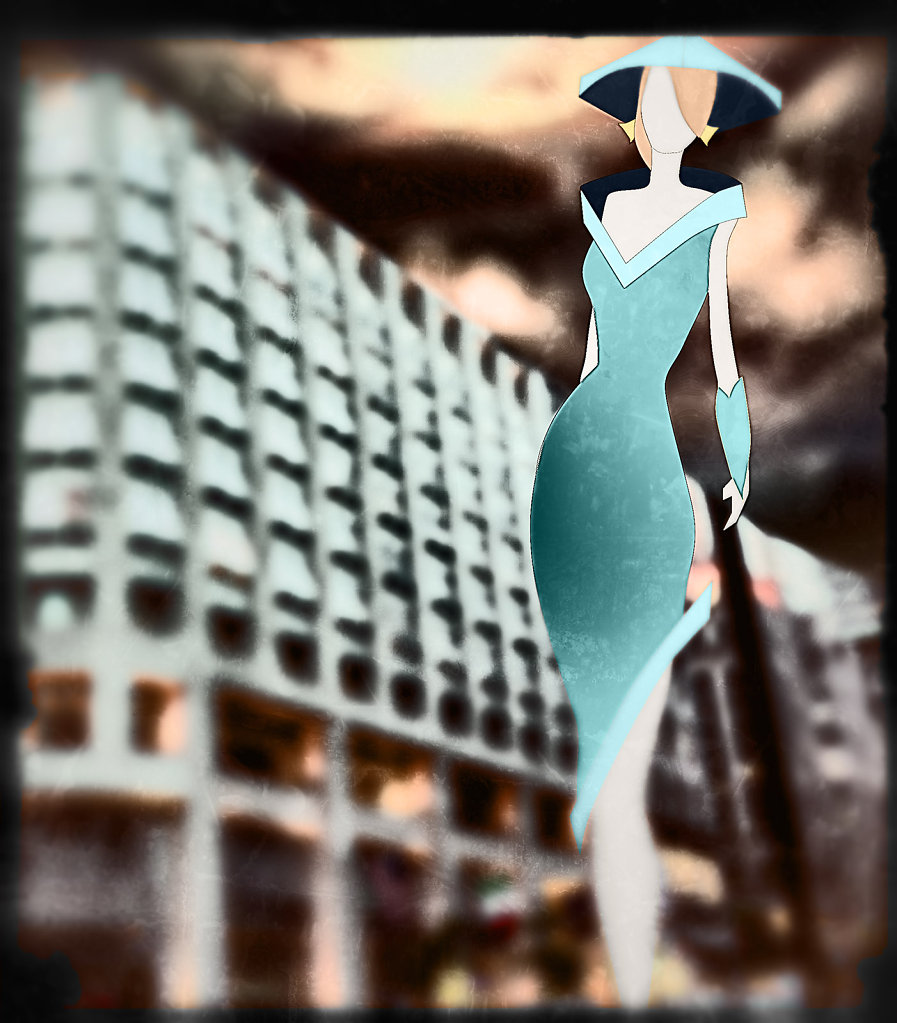
Folks who know me can tell you I have a very involved process when shooting. This is especially true of editorial and advertising spreads. Secretly I always wanted to be Stanley Kubrick. I want to make incredible films. Obviously I have not a single clue how to do that but do take an approach to editorials that I have learned from film making. That is the "storyboard" concept.
Now I am no illustrator. I will never get a sketch into a museum. That said I do plan my shoots when doing an editorial using storyboards. I create a virtual shot list that will tell the story I'm looking to tell via these sketches. So in this post I will share three storyboard sketches with you all. The story is called "Raygun". It was something I've been wanting to shoot for a while, but just haven't gotten around to actually doing. Maybe one day I will....
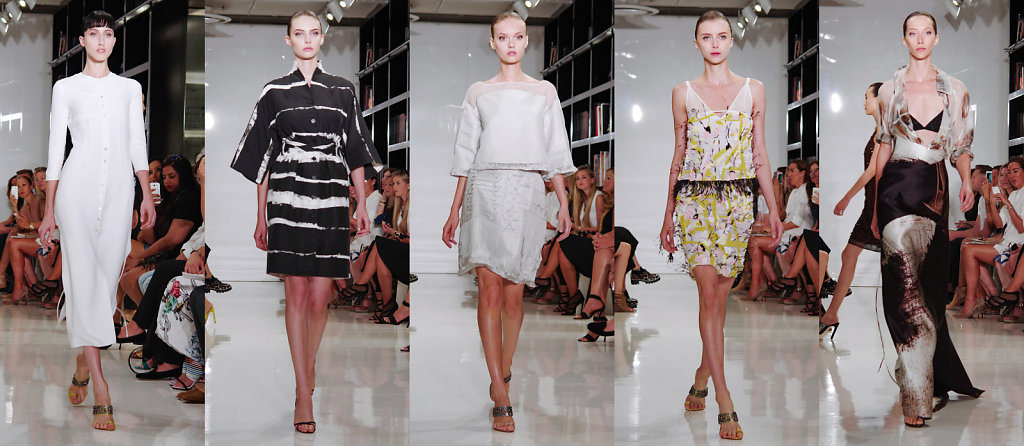
While freelancing for WWD prior to that outlets purchase by PMC, I had the honor of shooting what few knew at the time would be Ralph Rucci's final collection for the brand that bore his name. Shortly after that show Ralph would step away from his brand. I wish I had known myself, I would have tried harder to get even better shots.
That day I spent most of the time prior to the show speaking to my friend Jonas about his adventures as a much smaller giant in a Formula Ford running around Spa and saying hello and discussing food as usual with Rosina. I think we spoke briefly about eggplants and anchovies.
One day maybe I'll discuss how much I'm in awe of Ralph. He's always been cordial and pleasant, and honestly he never really needed to be to me. Whenever I meet him I remember a scene from Babylon 5 where G'Kar talks to an archaeologist on how an ancient race near some world does not even register the nearby humans in so much as to them we are but mere ants. Something far beneath even their subconscious notice. In truth I feel like the ant in that story whenever I meet him.
Here is a little of what I saw that day on September 6th, 2014. From what I can tell from hints he has dropped on his FaceBook he is working on something new. I can't wait to see what this Giant who walks among us will do next.
Just a quick entry now that the site has been redesigned and all my various online outlets consolidated to here. If you are looking for my work over on Blogger, I will not be publishing there any longer. Trying to keep all the sites together is just too much work. This is why I chose this new design for my site.
Today every website needs a blog to give insight to the company, service provider or artist that the site represents. Why make those interested in what I do and say go to several different sites just to figure out who I am and what I represent? It is quite liberating not having to worry about updating 3 or 4 different sites at once. One site to rule them all!
After updating and finishing the redesign I went out for some snack cakes and coffee and had my Galaxy S5 with me. I quickly in the fading twilight saw two wonderful things to shoot. The rail crossing and the sky....
Nature provides the best fireworks. Happy Independence Day folks!